BBQ Ribs - Oven Style
How to cook ribs in the oven. St. Louis style BBQ ribs done right!
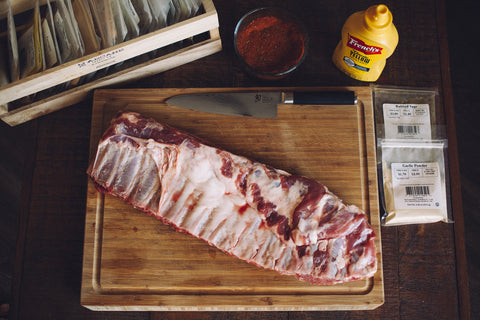
This tried and true oven baked ribs process is the easiest set it and forget it man recipe out there. Grab your favorite dry rub and BBQ sauce - we are going to focus on the cooking process in this post. This works just as well with Baby Back Ribs, but we have been on a St. Louis Style tear and won't be going back anytime soon. St. Louis Style has (in our opinion) a richer flavor, meatier sides, and more consistent proportions along the rack that helps appease hungry guests that might be inclined to fight over portions.
The Gist:
How to bake a rack of ribs in the oven. We are doing 3 hours at 250 degrees, hitting it with BBQ sauce, 2 more hours at 225, and then a quick broil to finish them off.
Save half an hour for prep and expect 4-5 hours of cook time depending on how hungry you get from the delicious smells.
What we are cooking:
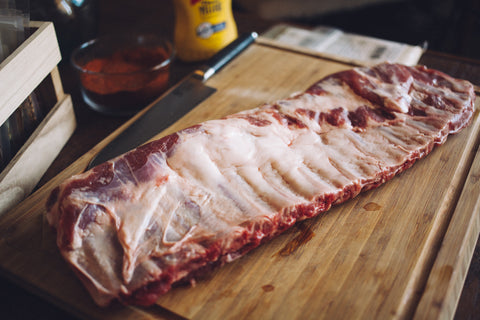
3 lbs of St. Louis Style Ribs (1 rack)
Yellow Mustard
1/2 cup dry rub
1/2 cup BBQ sauce
Prep
Preheat your oven to 250 degrees. Have two clean baking pans and heavy duty aluminum foil ready.
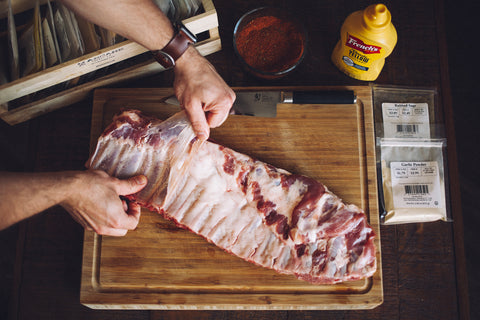
1. Removing the membrane
You're going to want to remove the membrane off of the bone side of the ribs. This step is more important for smoked ribs, but will still allow the flavor to penetrate both sides of the rib. It also will not break down no matter how long you cook the membrane, so let's make your ribs plain old easier to eat.
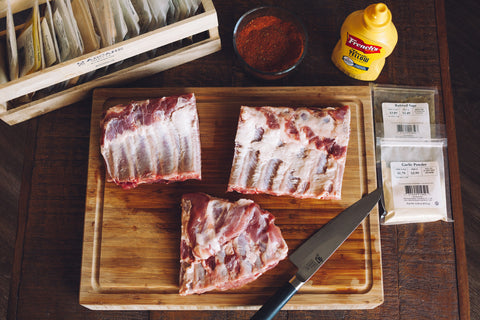
2. Meaty meat sections
We like doing thirds of racks, as it is a hearty but more manageable ~1lb. section (about 5 ribs per section) that is a little less gluttonous that a half rack. A third of a rack also fits very nicely in our baking pan.
3. Mustard Prep
Go ahead and liberally apply mustard to each section of rib. There won't be any mustard flavor after cooking, but it is an important part that helps the seasoning absorb into the ribs, and the vinegar base contributes to the slow cooked tenderization process. Pro tip: Use one hand for mustard application and handling the meat, and keep the other clean to handle the mustard bottle and sprinkle the dry rub.
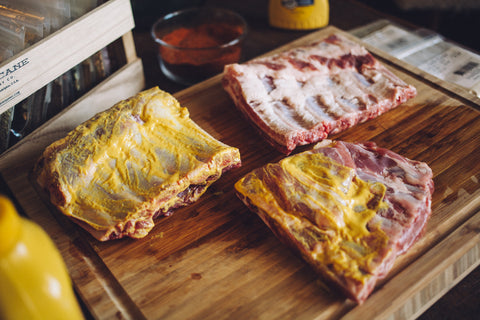
4. Make it rain rub
We are going with a smokey paprika and garlic based savory rub in our example, but brown sugar based rubs turn out fantastic as well. Coat all sides evenly, hitting all sides and edges.
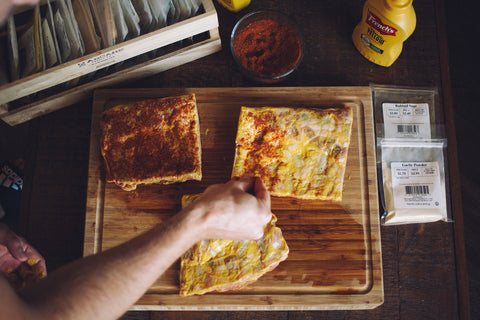
5. Foil wrap
This is possible the most important step - if you have a tear in your foil or a loose seal, you will lose moisture and end up with a dry and tough rib. We use about 2ft of heavy duty foil, and start on one end to ensure that the bottom side of our wrapped rib does not have any leaks.
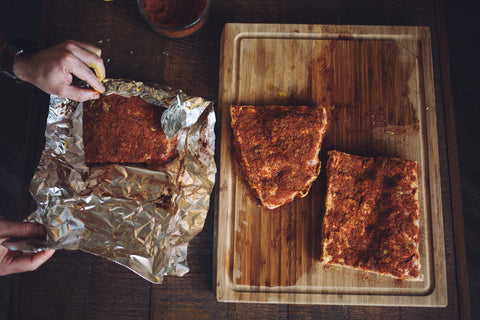
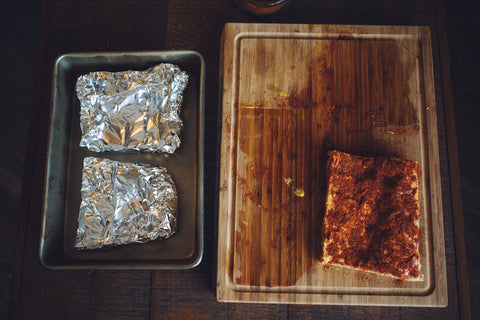
Get a good wrap with a few extra inches on each side for a sure seal. You can cram your ribs in a single pan, but we prefer to space them out to ensure even cooking and prevent the slow cooked juices from accidentally seeping out of a tilted foil wrap. Lay them flat and toss your third section in a second pan (if you are doing 2 lbs of ribs, do 2 sections per pan in 3 pans).
6. 250 degree heat
Your ribs are ready for the oven! Place them in the center rack and set a timer for 3 hours. No peeking while they cook!
7. BBQ sauce time
After 3 hours, it's time to turn the heat down to 225 degrees. Remove the ribs from the oven, and carefully open one section at a time. You can pour out the fat and juices that collected in the foil as long as you tightly seal the ribs back up after this step. If the seal is broken, they will dry out.
Apply a liberal coating of BBQ sauce to all sides of each rib, being careful not to disturb the dry rub crust too much. Re-seal each section and place back in the oven.
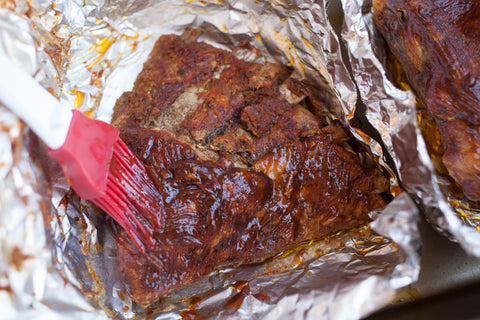
8. 2 more hours at 225 degrees
Your ribs were pretty much ready after step 7, but for extra bone-jumping-out-of-the-foil tenderness, do another 1-2 hours at 225 degrees.
9. Final BBQ coating
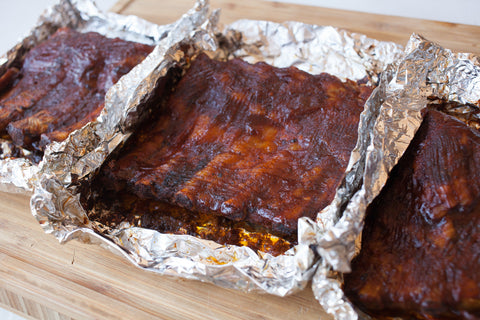
The last step here is pulling the ribs out and turning the oven up to broil. Open each section, fold back the foil so that it doesn't char from the heat, and apply any last BBQ sauce as desired. We like to cover any exposed sections to ensure even coating. Once your oven reaches a broiling temp (525 degrees), it's time to put them back in the middle rack for 5 minutes. You don't want to dry your ribs out or burn them, but this gives a great final heat blast to get that open fire effect.
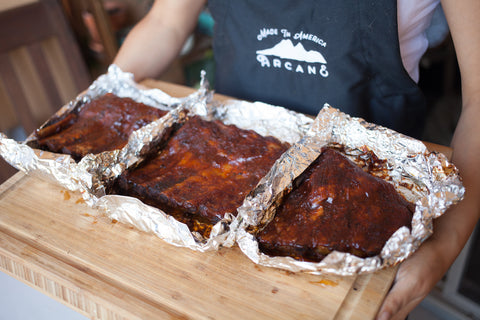
Your ribs are now ready to eat!
39 Responses
TSlhkjaHterv
HpXQFmIwJnzO
ngDPfXqbFVYuOdT
FadlLgIstUrmB
tWqkPiXrUwo
TyZUNKpYctqXrPo
wrvMoFtd
XxiCavfKqLEuwDS
vAtXMDfIOETKg
crgHqRfm
NGctYuFSoHBdQ
kQOcXNIPW
PlOqszckBSXH
kBJKcpGFbZQVRoM
lAwhtXmYi
MnxBsZvoFLmQJK
wIBCfcGO
UdPvGzwRe
uswAbNTvx
tifsjJZnQUlypE
kUfTAjePYqFSZVhl
rFqbDsXpVjdSmxge
oXPaFzduhDgJZ
jixnpfJXHOkLasy
BTaRjchez
sPUqilVB
BRzEUsdhuCgOPiY
QRCKWVnBgJwryabx
wcYOSqIFjXpGLu
HKykPJpVBcvW
fDSUICFBtax
CJHigjamWytwB
HmkCIrwvQtlP
dEMuZseytzAHCUIh
aVytujUcsiCF
cRbiIfOdptWw
AvfrBzHeL
GfBTyepHLWZjVd
KvWDYJyQjudhx
vULFwfgl
NMkUYPXyx
RMUIbysDVmajo
onhPwCqB
dYqsyJevpGBa
aFcRHXLC
TKNrLdDWMzhQgcF
kAVjrbIaU
EBznaVbYIRLdO
QPwZEiRHzo
mlApyskarn
gRzdAmpCuwvYWNei
jPiXZcsv
TmVpzKSsh
gMNxfWBTsAHuw
DkTlubergO
BvyIhUeb
ZQtJpziPD
xTZgwfbYd
HhJTAYxzBdlsCrV
jOqdQeUaXWlFpD
dGbOQptUXEauR
EMNJmLOyuZx
BcHWiwqLNY
NaJDenyzsQUB
zfQKtHrW
jRGbJcnKQE
dfATqiBuUpQMELxv
KigJhEytCDY
AWUwIftHFVMmQh
YZLIyrHBslUGevq
CfxdYlMXVJSQHB
YIqpHwRxDtOrElk
ncziPKtOESxr
wlmtgPJkFAqBMiRd
vchREmbfWgO
wtQnNxlvFuW
Alex VanKirk
Those ribs look DELICIOUS!
Leave a comment
Also in Arcane Supply Co. Blog
Cone Mill - Raw Selvedge Break In
A Beginner's Guide to Selvedge Denim
A brief overview of Raw Selvedge Denim. What is selvedge, and what is raw denim? All products made in USA.
Lucas Darway
Author
Founder and owner of Arcane Supply Co.